How to recycle your dear old vinyls with 5 new proposals to make at home by following a few simple instructions.
He is about to end up run over, his mother saves himArtgallery 18 cd holder, Vinylux plate and centerpiece, bag from the “Genetically modified waste” line, were some of the ideas we presented to you some time ago. Today we return to talk about creative recycling of good old vinyls with 5 new proposals to be made at home by following a few, simple instructions.
Arm yourself with fabric, glue, adhesives and lots of creativity. The results? With a retro and decidedly original taste.
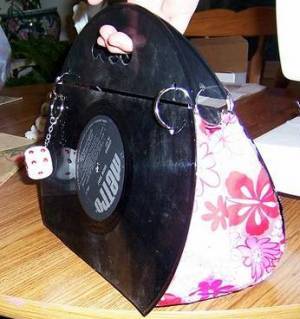
1) The "musical - chic" handbag
Do you love the wildest originality? Especially in the accessories? This bag is for you.
What you will need:
- a utility knife;
- a ruler;
- sandpaper;
- a drill with a flat tip and a thin round tip;
- hot glue gun;
- two 33 laps;
- fabric;
- sewing machine;
- wire;
- 4 metal rings.
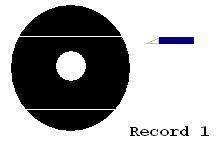
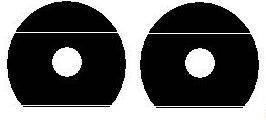
Take one of the two 33 turns and place it on the work surface with the outside facing down. Helping you with the cutter and a ruler, cut the disc into 3 parts, as shown in the figure in order to obtain two crescents and the central body of your future handbag.
Once the first operation has been performed, place the central part of the cut disc on the second 33 rpm, match the surfaces together and engrave the second disc so as to obtain another 3 equal parts.
Now you should have 6 pieces in front of you, eliminate the two smaller ones and concentrate on the two remaining crescents that will become the handles of the new fashion purse.
First thing, with sandpaper, smooth and soften the edges of the vinyl that you have engraved with the cutter. Then take the flat-tip drill and, at the height of where you will insert your hand, make a first hole. Repeat this three more times to make room for four fingers.
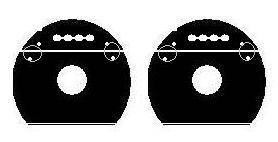
Repeat the operation for the second handle as well.
Now use the fine tip drill for drill the holes for joining the handles of the handbag to the central body. The union between the four pieces will take place through the metal rings, so make sure you take the measurements of the circumference of the rings well, otherwise you will not be able to insert them in the appropriate seat.
Once everything is assembled, we move on to the fabric.

Cut out three distinct pieces that will be inserted respectively on the bottom and on the two sides of the bag. Each cutout must have a duplicate, in order to create the inner lining of the new bag and, again for the lining, you will need to add two more cutouts that will correspond to the inner sides of the discs. In all, you should therefore have 8 clippings.
With the sewing machine join the two side cutouts with the bottom cutout. You will get a strip that will be glued along the perimeter of 33 turns with hot glue.
To make your wonderful piece more durable, sew the remaining pieces to create the inner lining. Take the hot glue, e apply the lining on the inner surface of the two 33 laps making sure to glue the inside with the outside fabric, so as to eliminate any possible gaps.
Let it all dry and, voila, here is your new bag, absolutely unique.
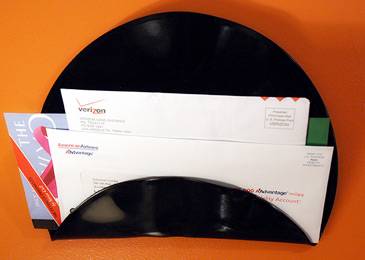
2) Postman
needed:
- a 33 rpm;
- oven;
- baking tray;
- a ceramic bowl;
- a plate.
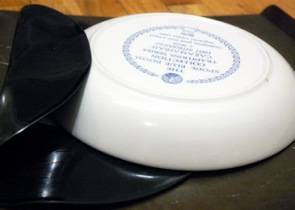
Preheat the forno at 200 degrees. Place the bowl upside down on the baking sheet and place the disc in the center. Bake for 2 minutes.
After the cooking time has elapsed, check theeffective malleability of the vinyl. If the disc has deformed when it rests on the bowl, it means that it is ready, otherwise leave it in the oven for another 1 minute.
Once removed from the oven, bend 1/3 of the disc on itself. Remove the bowl, place the vinyl on the baking sheet and insert a plate between the base of the letter holder and the curved side to prevent the curved edge from sticking to itself.
Bake again for about 1 minute and, once ready, let it cool to room temperature. Very good, the postman is ready.
3) Bring earrings
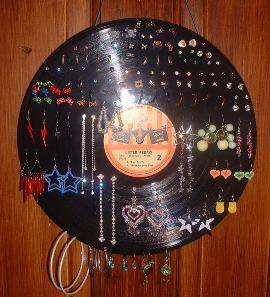
Material::
- ago;
- lighter;
- 33 rpm.
Definitely one of the easiest to make, the vinyl earrings holder will add a touch of color to your room. Just take a large enough needle, heat it over a flame and apply holes directly to the vinyl. Insert your eco-jewels and that's it.
4) Clock
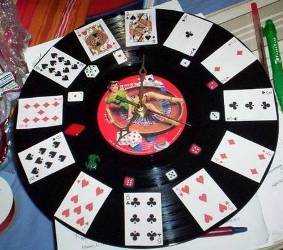
Material:
- wall clock mechanism;
- necklace;
- stickers.
Buy an inexpensive clock mechanism and attach it to the back of your vinyl by passing the hands through the center hole. If you are a fan of minimalism, we can tell you that your timepiece is ready, it will be a bit difficult to guess the exact time, but time is relative, isn't it ?!
For those who love to indulge themselves, however, there are stickers, old playing cards, and prints that can be applied on the dial. A few more guarantees on the timetable, the choice is yours.
5) Vinyl bottle holder
- Good music and good wine, perfect mix.
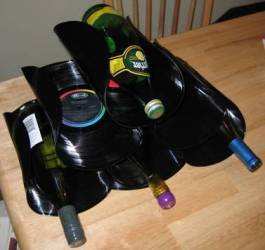
What you will need:
- 33 turns;
- Strong glue;
- Oven;
- Baking plate;
- Bowl.
How to do? You will have to follow the same procedure as the letter holder, baking your 33 turns at 200 degrees for 2, 3 minutes. In this case, however, the vinyl will be folded on both sides, so as to create the seat for the bottle. Based on the number of 33 turns that you have decided to shape, take the glue and join them together as you like. Make sure that the structure is in balance and proceed to insert your precious bottles of organic wine.
Serena Bianchi