November is a great month to dedicate to propagation by cuttings. Here are the plants to reproduce and how to proceed for lush growth
November, which is the dormant period of the plant growing season, is the best time to catch hardwood cuttings and grow new trees and shrubs. These cuttings also called hardwood cuttings they are slower to root than conifer cuttings taken earlier in the year, and are a good option for those with less time for plant propagation during the main growing season. Let's find out which plants can be reproduced in November and how to proceed.
Index
When to take hardwood cuttings?
Le hardwood cuttings they can be taken from most deciduous shrubs, some trees and a variety of creepers. These do not bend easily, unlike softwood ones, and can be taken at any time during the dormant period, but the best times are usually right after the plants have dropped their leaves in the fall, or just before they leaves break off in spring; generally the most suitable time is just the month of November.
Hardwood cuttings to be taken in November
Le hardwood cuttings to be taken in November I'm:
- blackcurrant
- Red currant
- gooseberry
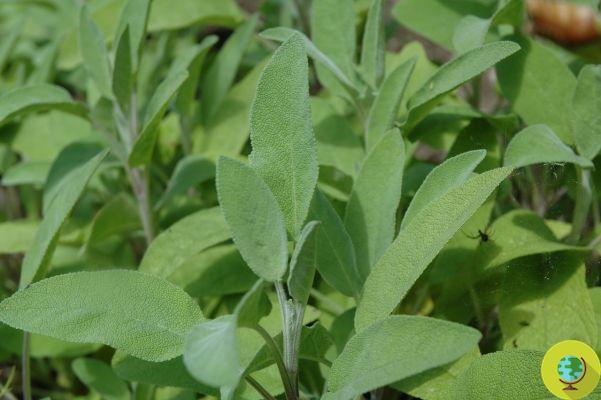
- elder
- follow
- Willow
- ivy
- jasmine
- climbing roses
- dogwood
- Quince
- poplar
- anemone
- fico
- snow berries
- plum
- forsythia
- Abelia
Evergreens can be made as hardwood cuttings, but they are slower to root and the technique is slightly different. Watch out for invasive species including eastern bittersweet (Celastrus orbiculatus), winged euonymus (Euonymus alatus); Russian olive, American wisteria (Wisteria frutescens); White mulberry (Morus alba), and various species of honeysuckle.

@Gstockstudio/123rf
How to take hardwood cuttings
First of all you need to select i healthy sprouts, that is, those that have grown during the current year. Remove any growth from the tip and cut sections of about 30 centimeters, making a slanted cut at the top to let the water out, and a straight cut through the base.
With elderberry, as with other plants with concise stems, be sure to cut where the sprout joins a branch. Others, on the other hand, should be cut just below a gem or pair of gems. After that you have to insert the cuttings in a hole prepared with a fertile soil modified with abundant organic matter; that's how:
- about two thirds of each cutting must be below the soil surface
- put the cuttings at a distance of 15-20 cm from each other
- leave the cuttings alone during the winter months, and water them during the dry spells the following summer.
Another way is to simply place the cuttings in containers, filled with a draining growing medium, and store them in a cold facility, tunnel, or unheated greenhouse until the following fall. You just need to be very careful to make sure the cuttings don't dry out.
Hardwood cuttings: how to proceed step by step
La propagation by cuttings of broad-leaved trees it is quite simple; here is how to proceed step by step in order to obtain a healthy and luxuriant growth.
Step 1
Go out into your garden and get the longest canes you can use for cuttings. Cut the reeds about 12 cm.
Step 2
Remember that the point where you make the cut on the bottom is essential, and in order not to make mistakes you have to observe the plant. Where there is a knot, or union of buds, that is where the plant will produce a leaf, then a stem in the next growing season. When you make the cut you need to cut right under that knot. Cutting on the top of the cutting is less critical, and most growers actually do the cut about an inch away from the top knot.
Step 3
The next step, which consists indip the cutting into a rooting compound, it is really optional. Rooting compounds help when rooting cuttings, but many plants root well even without them. So, if you don't have a rooting compound on hand, don't worry as you can proceed anyway.
Regarding the choice of powdered or liquid rooting compound it doesn't matter, they both work.
Step 4
Once the cuttings have been taken, the next step is simple: take them out and plant them in the ground. You can put them in a nursery pot filled with soil or in a bed of sand. To plant the cuttings, simply make a hole in the ground with a spade or wide knife and stick the cuttings about 1,5 "to 2" deep.
Step 5
As soon as you insert the cuttings, water them very well in order to wash the soil around the base by removing any air pockets. After that, water only when necessary to keep the soil more hydrated but not soggy. If it's cold outside and the ground freezes, your cuttings won't need water, water them again when the temperature rises.
Step 6
In the spring, when the cuttings start to wake up, give them water at least once a day. Keep in mind that they don't have roots, so if they're in a shady area it's best. They will leave leaves, they will start to grow, but they may still have no roots. Be patient. You can pull one out every so often to check progress but if you feel resistance at the bottom, be careful as they are definitely taking root.
Follow us on Telegram | Instagram | Facebook | TikTok | Youtube
Could it be interesting for you:
- Rose cuttings, the time has come to multiply your plants for a flower garden
- Now is the best time to take cuttings and fill gardens and balconies with plants at no cost
- How to grow wisteria from cuttings: all the tips for perfect flowering
- Multiplying succulents has never been easier: techniques for perfect cuttings