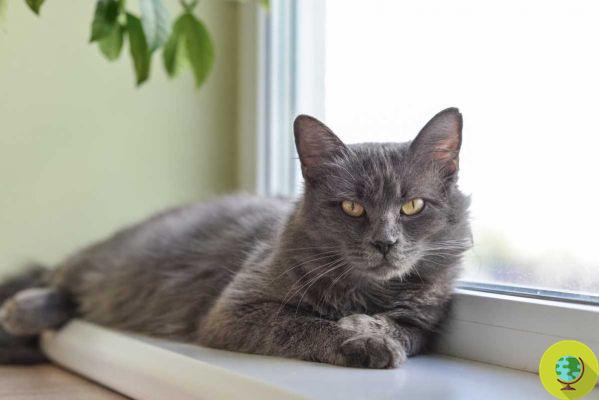
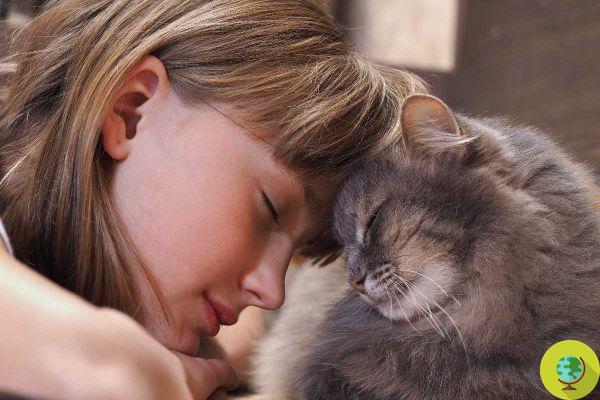
How to secure chairs, sofas, furniture from the nails of our feline friends? With the scratching post, the ideal solution to give your cat a place of his own to sleep, play, get his nails done and keep fit. On the market, it is true, there are all types and at very different prices depending on the size and materials.
He is about to end up run over, his mother saves him
How to secure chairs, sofas, furniture from the nails of our feline friends? With the scratching post, the ideal solution to give your cat his own place to sleep, play, get his nails done and keep fit. On the market, it is true, there are all types and at very different prices depending on the size and materials.
But if, like me, you don't want to spend a fortune to safeguard the sofa, which will still be scratched - I assure you -, it's time to take out the toolbox and create a fantastic and functional scratching post using recycled materials.
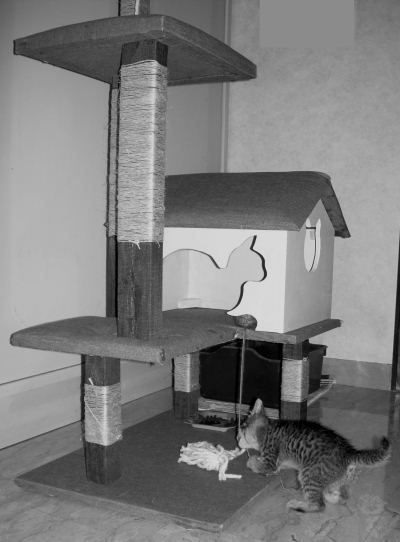
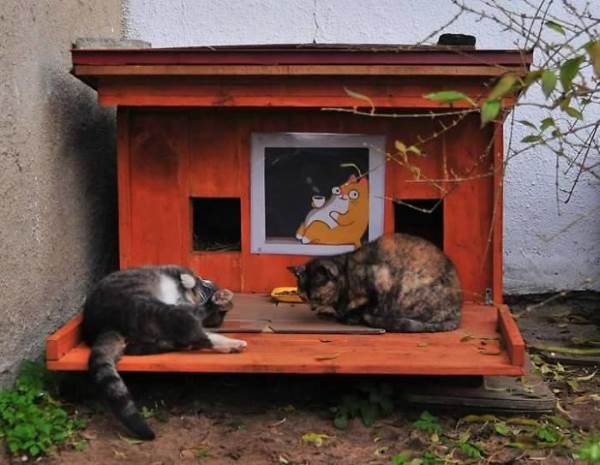
Freely inspired by a tutorial found by browsing the internet, we built it and the result went beyond all expectations. Soffina, the queen of our house, loved it from the first moment. After playing for about ten minutes with the ball, she immediately discovered how beautiful it was to scratch each portion of the surface and she began to jump with agility from one shelf to another. Especially popular are the intermediate floor and the highest column covered with rope.
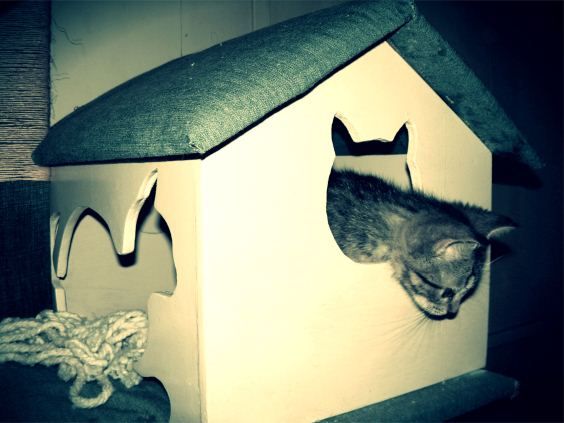
Small mole, I warn you immediately, it is thereuse of the house, practically nil: Soffina enters it only if attracted with a game, in spite of all the sacrifices made to make it and to carve the windows in the shape of a cat's face and the entrance with the silhouette of a feline in action. In fact, the "recycled" scratching post it would be functional without it, but the house was too beautiful not to be built.
Index
TIPS
Before getting to the heart of the work, a couple of tips and recommendations that are always useful.
Remember that for the cat scratching is a territorial instinct and that through the scratch the animal leaves its scent on the territory. Therefore, as far as possible, avoid scolding the animal when it threatens upholstery and furniture and allow it some "extra scratches".
Don't make the mistake of "show the modality in which the scratching post is to be used, but let the discovery happen autonomously and gradually. The cat loves rough surfaces and will sooner or later be intrigued by the new "host". Help him maybe by playing a lot on the scratching post and hiding food from time to time on the various shelves.

Once built, place it in one "busy" area of the house, used by the family and clearly visible, not in a hidden corner. For example, we have put it at the entrance: by climbing on the scratching post Soffina can thus check the situation in all the rooms and observe us when we enter and when we leave the house.
If possible, I finally recommend fixing it near the bowls and litter box, so that the cat can always be nearby when the "inspiration" for the scratch arrives.
Well, we're ready to go.
REQUIRED
Here's what to creatively reuse to make this scratching post:
wood at will for the shelves and the house. We, for example, used shelves from an old piece of furniture and wooden boxes that contained wines;
wooden stumps and sticks for columns, but also the legs of an old table or unused chairs are fine;
old jeans to line the shelves, the columns and the roof of the house, but you can also use scraps of an old carpet and other fabrics, as long as they are resistant;
3 balls of string to wrap the columns, ideal for its resistance and the roughness of sisal, which also gives the scratching post a "rustic" look;
some old pillow which, once unlined, will provide foam rubber to make the shelves "soft". We used foam rubber in the left half of the first shelf, in the second and third floors and on the roof boards;
indispensable, then, wood glue for attaching foam, fabric and string ends, viti to fix the columns to the shelves and assemble the house and 4 feet to raise the scratching post from the ground and make it more stable.
Recommended tools:
rubber hammer to glue the fabric, fretwork bow to cut the entrance to the house and the cat-shaped windows, saw, scissors, electric screwdriver or screwdriver
MEASURES
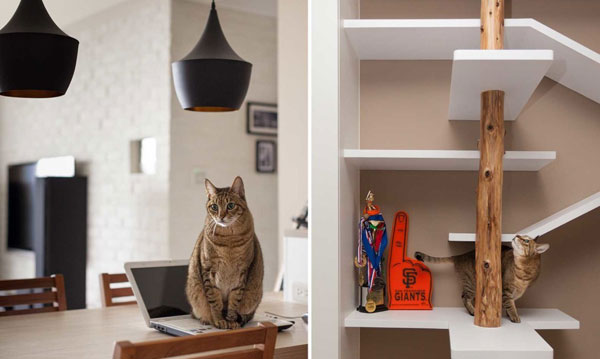
Now let's see the measures of our scratching post which, of course, can be adapted and modified according to the wooden boards at your disposal. Green light, therefore, to the imagination, but with one care: whatever the changes you make, it is essential that the scratching post is tall enough for your cat to fully extend their body.
2 shelves of 60cm x 42cm for the base and the first floor;
1 shelf of 40 x 30 for the second floor;
1 shelf measuring 26 x 26 for the top floor;
3 columns of 30 cm (between base and first floor);
2 columns of 50 cm (between the first and second floors);
1 40cm column (for the top floor);
house: 2 floors 35cm x 20cm (side sides of the house), 2 floors 30 x 28 (front and back sides), 2 floors 42 x 22 (for the roof) and 6 wooden triangles.
REALIZATION
1 Prepare the columns covering them with jeans and then with the rope, taking care to fix the ends with glue;
2 coat the upper part of the base with the fabric, gluing it and beating it with the rubber hammer (do this every time you need to use the glue), let it dry and assemble the first 3 columns, fixing them with two screws from under the shelf;
3 cover the left half of the first floor with the foam rubber (on the right goes the little house and the foam would make it unstable) and the whole shelf with jeans. Fasten the two 50 cm columns to the first shelf always from below and with two screws;
4 assemble the two prepared pieces together (base + 3 columns, first floor + 2 columns): place the first floor on the three columns, making sure it is perfectly aligned with the base. Screw one screw for each column from above;
5 let's move on to the second floor: cover only the lower part with the fabric and fix it to the two columns already assembled. Then also cover the upper part with the foam rubber and the fabric;
6 now missinglast column and the highest shelf. Always attach the last 40 cm column to the second floor from below and with two screws, taking care to offset it from the column below;
7 cover the lower part of the last shelf and fix it to the column with two screws from above. Now cover the upper part with foam rubber and fabric;
8 if you have come this far, congratulations! But now the hardest part has come, the construction of the house. Carve the windows and the entrance. Fix the various pieces together and strengthen the structure with low internal corners, 4 triangular pieces on which to screw the screws;
9 also coated the boards for the roof with foam rubber and attach them to two triangles to give them the sloping shape;
10 place the structure of the house on the scratching post and overlap the roof; then hanging the games you want
We have reached the end, now the scratching post is ready to be used. But before you have your feline tested, make sure it is safe, stable and sturdy, and that all screws have been covered in fabric.
How much effort is it? But it was worth it, you managed to make your cat feel good and help the environment!
Roberta Ragni