Wreaths of dried flowers, here are the tutorials to make them with the DIY in a few steps. Beautiful and easy projects
He is about to end up run over, his mother saves himDried flowers, a few branches or an aluminum wire, a pinch of dexterity and above all a lot of creativity. These are the ingredients that cannot be missing in one DIY garland. Nice to hang on the door or on a wall at home. But how is it done?
First you need to dry your favorite flowers. It is not too difficult. You can simply group them and hang them upside down for a few weeks in a dry, dark place.
Lavender, mallow, roses, jasmine, hypericum, hydrangeas are just some of the plants that can be used for this very versatile project. They will lose some chromatic vibrancy, it is inevitable, but they will have an absolutely unique vintage charm.
Index
DIY dried flower wreath
The doitmagic youtube page explains how to make a beautiful dried flower wreath step by step. Here's what you need:
- malleable iron wire or ready-made circle base;
- dried flowers;
- satin ribbon or drawstring;
- shears;
- nippers;
- tape.
Method
- First create a circle base with the wire. Otherwise, buy it ready.
- Get the flowers you need from the bunches of dried flowers and fix them with a thin wire at the base. Alternate flowers of various types, until you have covered all the base or part of it, depending on the desired effect.
- Add satin ribbon, or alternatively a cord for a more rustic effect, and the wreath is ready to hang.
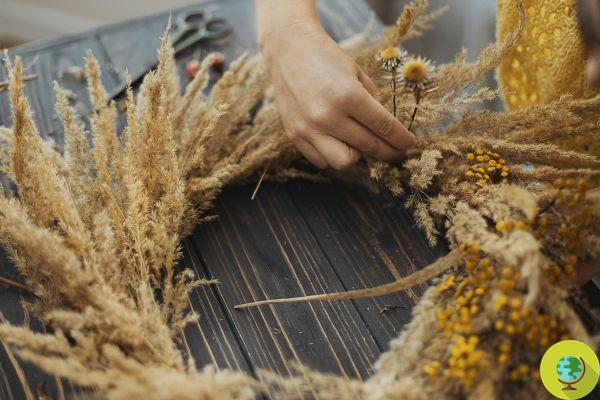
DIY wreath with dried flowers and sprigs
You can also make the base of the wreath with simple twigs, wrapping them on each other to form a circle. To keep them together, use a few pieces of thin wire.
In this case, Essentially Hops advises us to make small bunches of flowers from larger ones, closing them from time to time with raw cord.
Arrange them on the base, fixing them with the string, until at least half of the garland is filled. A drawstring at the top and voila, the garland is ready to hang.
DIY dried flower garlands: the most beautiful on the web
DIY dried flower wreaths lend themselves to countless reinterpretations. You can indulge yourself with flowers, alternating them with some green leaves or spikes with a more rustic style. And if you love bright colors, the spray instantly adds liveliness.
Super-colorful DIY garland
If you want to imitate Petal Pusher Studio's wreath, you will need lots of different brightly colored dried flowers, some smaller, some larger. You will also need green elements. In this case, the garland must be covered only in the central part.
View this post on Instagram
A post shared by PETAL PUSHER • STUDIO (@petalpusherstudio)
Rustic but chic dried flower garland
A decidedly more rustic but chic style for this garland by Blomkje En Wenje.
View this post on Instagram
A post shared by Blomkje en Wenje (@blomkjeenwenje)
Wreath with dried flowers and branches
If you want an even more rustic effect, you can make the base of the wreath yourself with twigs, joining them with pieces of wire.
View this post on Instagram
A post shared by Jonima Flowers (@jonimaflowers)
DIY wreath with country flowers
Here is the perfect country wreath for those who love simplicity.
https://www.instagram.com/p/CSymaNEILbD/
Colorful dried flower wreath
Dried flowers can be painted with special colored sprays. Get creative and create a colorful garland.
View this post on Instagram
A post shared by The Flower Plant (@theflowerplant)
Elegant dried flower wreath
Do you love pink? Nothing better than making a themed wreath. Like the one proposed by byjasonlloyd, where pink alternates with beige.
View this post on Instagram
A post shared by j a s o n l l o y d (@byjasonlloyd)
Read also:
- Ideas for making a Christmas wreath with what you have at home
- DIY home decor and items made from recycled materials